12/8/14

O Christmas Tree


I love Christmas.

I start listening to Christmas music in August.  I buy any decoration that is properly covered in glitter.  I bought my first tree and started collecting ornaments when I was in high school.

For the past 8 years I've even had a Christmas-tree-decorating-tradition: Sean, one of my best friends, has come over to my house for almost a decade and helped me decorate my tree.  We have dinner and watch Christmas movies and hang all things sparkly from my tree.

He is also the only person that I know that can put the star on my tree.  It's way too heavy and takes roughly half an hour of maneuvering to get it to stay up there.  But it's made of solid glitter and I love it.  So every year Sean bitches and whines takes my direction and somehow manages to wedge that star on top of the tree.  It's why I keep him around.

Maybe slightly to the left.
But alas, this year my tree tradition has been broken.  I sold my house, packed up all of my things, and moved to South Carolina last week. I'm in temporary housing for a few weeks and while the weather is already a tremendous improvement, I am missing my Christmas tree.  It just doesn't feel like the most wonderful time of the year without the glow of lights in the evening.

So I will reminisce here about years of Christmas past.

When I bought my first house in 2011, I received the Christmas decorating gift of a mantle.  And I've had some fun with it over the past few years.


Also - if you need some (almost) free entertainment this holiday season - pick up some of these 3D Christmas glasses.  They turn each Christmas light into a different shape (I chose the reindeer version).


I'm also a huge fan of driving around looking at Christmas lights during the holiday season.  I am way too lazy to actually put lights on the outside of my house, so I really appreciate the effort that others go to to provide my entertainment.

My favorite - perfectly round tree.
And then there's also the time honored tradition of dressing my dogs in Christmas garb.

I believe her face says it all.

But I couldn't have my first Christmas in South Carolina be totally without cheer.  So to Target I went.  Meet my mini Christmas tree.


He may look kind of sad (he doesn't photograph well), but I already love him.

I plan on taking a Christmas tour of Greenville very soon, and I will post again about all the wonderful (and sparkly) things that I'm sure to find.

Happy Christmas season!

Jordan


Read More »

11/27/14

Happy Thanksgiving (and adios, Indiana!)
Thanksgiving is one of my favorite times of year.  Not only does it kick off the holiday season with a ton of foods that are absolutely terrible for you (but taste oh-so-good!), it's the perfect time to reflect on the things that you are thankful for in your life.

And I have to admit that I am truly blessed.

I have two wonderful parents who have loved each other and me for the past 27 years unconditionally. My parents have provided an excellent foundation for my life and they are truly the reason that I have and can do all that I do.

I have two wonderful siblings, whose sense of humor cannot be matched.  My fur babies bring me such joy, and watching the community of people that are adopting homeless pets this holiday season just brings a warmth to my heart that cannot be expressed.  I also have a close group of friends that are really more like family.

The thing that I am most grateful for this year is a new opportunity that I have been presented with - the chance to leave Indiana and move to South Carolina.  All those wonderful relationships that I mentioned before - they have been really put to the test this year.  I have been an emotional wreck in making several huge life decisions, and my parents/siblings/friends have been by my side, lending a hand when I needed help prepping my house for sale, helping me move all of my things, and providing advice/comfort when I needed it the most.

I bought my first house in 2011, and over the past three years I have spent countless hours transforming it into my first home.  I completely revamped the kitchen (new countertops, backsplash, floors, sink, hardware and painting the cabinets) and no wall in the house was left unpainted.  I am actually really proud of how it turned out, even though I can't say that I am very sad about leaving it behind.


My good friend Jill Curtis helped me list and sell my house.  She is amazing and I highly recommend her if you are trying to buy/sell in Indianapolis.

Even though I have no idea what 2015 will bring, I am so excited about the unknown.  I've spent 2-3 weeks out of the year in South Carolina since I was born, and I can't tell you how thrilled I am to be making it my permanent residence.  I am temporarily moving to Greenville, where my parents have recently relocated, but my ultimate goal is to end up in Charleston.

If you've never been to Charleston - I highly recommend it.  We visited a few years ago and I was absolutely blown away with its beauty.


Wherever I end up, I have a wonderful support group that will be there for me, and that is what I am most thankful for this year.

I hope you and your family have a wonderful Thanksgiving and get to spend time with the people that you love.  Because, quite honestly, that's the most important thing.

Jordan


Read More »

11/16/14

Sticky Floors


Another lesson in buying your first home: you will never catch everything that is wrong during an inspection.

Case in point - my kitchen floor.  As you can see, it's just sheet vinyl. Nothing particularly fancy.  It wasn't horribly ugly, but I wasn't in love with it either.


And even though I spent several hours (along with my parents and my inspector) in my house before I bought it, it was only when I was loading up the fridge on move in day that I noticed a large crack in the floor.

There is an island, so when they laid down the sheet of flooring, there obviously had to be a seam where the flooring was cut.  However, it could have been installed properly (how that is done, I have no idea).  Since I wasn't particularly fond of the flooring anyway, I never fixed the seam because I planned on replacing it at some point in the future.

So three years later, after mopping over it and general traffic, the seam looked like this:


Ick.

I was prepping my house to list it for sale, and I knew the flooring needed to be replaced.  I didn't want to spend a ton of money, and my dad mentioned something that he had seen on HGTV (he watches daily, he has no shame).

Peel-and-stick flooring.

Yes, you probably just had the same reaction that I did.  NO FREAKIN' WAY.

We had the peel-and-stick tiles in our laundry room when I was growing up. They were hunter green with diamond centers and to this day I still have nightmares about how ugly they were.

That was not going in my house.

Still, I humored my dad and let him take me to Lowe's to take a look at said peel-and-stick flooring.

There were options that looked like wood planks and tile that was actually grout-able.  I was absolutely blown away by the appearance, but the online reviews still had me skeptical.  Would the adhesive really work?  And if so, for how long?

Only one way to find out.

Lowe's was running a special where you received $10 off an order of $50 if you ordered online and picked up your items in the store, so my entire kitchen floor (around 180 square feet) cost me $156.00.

Definitely worth giving it a try.

I chose the wood plank option because grouting seemed like a hassle, and a wood-like surface was what I was really aiming for anyway.  Many of the reviewers stated that the adhesive didn't work and the planks buckled immediately.  I was so apprehensive that I kept the boxes and paper backing just in case the flooring didn't work so I could return it.

Three months in - it still looks fabulous.

I laid the planks directly on top of my existing kitchen flooring.  I vacuumed the surface once, mopped it with a water/vinegar solution, vacuumed once more, and mopped it with water/vinegar a final time.


The directions tell you how to initially lay out the planks, and we opened several boxes at a time and pulled planks randomly from each box to mix up the pattern.  Just peel back half of the paper, apply it to the floor, and pull back the rest of the paper as you lay down the plank.  The planks are extremely pliable, and although the directions tell you to score the plank with a box cutter, most of the time we were able to just snap the plank where we needed it (straight edges weren't a big deal for my kitchen).

Yes, that's my lovely mother slaving away.  Hi, mom!

The glue is atrocious.  I mean, really.  It was on the sides of the planks and it was a nightmare once it got stuck to your hands.  But a little canola oil removed it, and we had to take several breaks to get the goo off of our hands during the 8 hours (yes, it took us 8 hours) of installation.

I have to say this - my mom has some patience.  I would have quit on me a few hours in.

I've only found one setback - it scratches easily.  I noticed immediately that my dogs' nails were leaving marks on the floor.  You can only see it when the light shines on the flooring a certain way, but I'm extremely OCD and I know the scratches are there.  The real question is - can you see them?


So if you have pets, I might be a little apprehensive about putting this flooring down.  No critters running about? No issue.  It looks amazing, was a fraction of the cost of laminate or actual wood flooring, and it's water resistant to boot.

And just in case you were wondering - Lexi approves.


So, much like my recent wallpaper discovery, peel-and-stick floors are back. And until I told my Realtor that the floors were really peel-and-stick, she had no idea.  Mission accomplished.

Jordan


Read More »

10/27/14

Patio Love

I purchased my first home at the beginning of 2011, and I've learned a lot. Both about home ownership in general and about myself.

This past summer, my dad came over to help me dig some particularly stubborn weeds from the base of a tree in my front yard.  Which is how all 26-year-old women want to spend their Saturday afternoons.

When we were finished weeding, my dad was standing in the driveway watching as I attempted to drag my giant trash can filled with weeds from the grass onto the driveway, got stuck several times and almost fell over. Once I made it up to where he was standing, he stared at me and said: you're a condo person.

He's totally right.

Buying my first house has taught me that I. Hate. Yard. Work.

Mowing, weeding, planting things.  I kill just about everything (succulents and cacti aside - because, really, who can kill those?).  If anyone gives me plant life or flowers of any sort, I immediately give them to my mom. Because they are doomed to die a slow and painful death if they reside anywhere near my house.

So lately I've been dreaming of patios.

My house has a large deck and a small lawn, and I've sat out there maybe 10 times in three years.  It's uncovered, and there are bugs.  Like tons of bugs.  As in I've tried every type of candle/spray to get rid of the mosquitoes, spiders, bees and wasps that are constantly hovering around my deck, and nothing seems to work.

Lesson learned: I am not a lawn person.

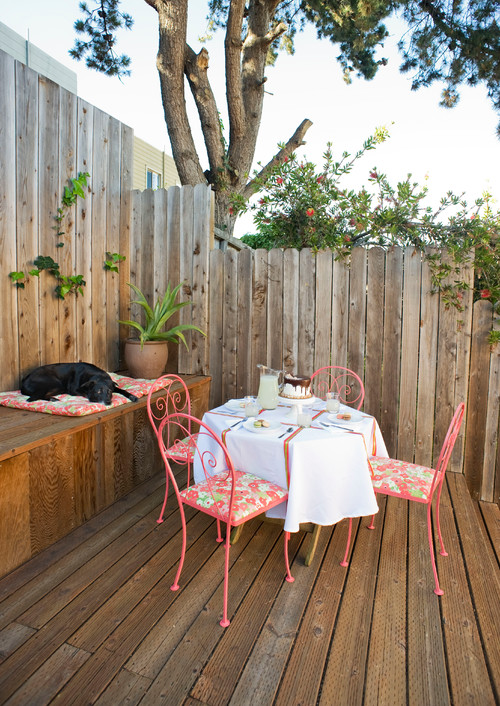
I am, however, a patio person.  My next move is probably going to be purchasing a condo, where I dream of having a small patio like one of these:


I have two dogs, so I realize that I need some sort of outdoor space.  But look at that puppy up above laying on his color-coordinated pillow on that patio that contains very minimal plant life.

That's the dream.  Now let's see where my life actually takes me.

Jordan


Read More »

10/18/14

Three Cheap & Easy Art Projects

When I first moved out on my own, I was broke.  I mean dead broke.  As in put-my-last-five-dollars-in-my-gas-tank-and-pray broke.

So needless to say - when the time came to decorate my first apartment (and really my first house), I did not have the funds to purchase endless supplies of art to cover the walls.  The only good thing about being this poor in your early years - you become resourceful.

I found that I didn't have to spend a fortune to make things pretty.  Here are several art projects that I completed in my home for under $50.


Working with Scraps

I love scrapbooking.  But I have neither the time nor the patience to actually complete most of my scrapbook projects.  But I loooooove scrapbook paper.  An endless supply of colors and patterns for less than a quarter a page? My budget could definitely handle that.

I purchased a scrapbook paper book that contained 180 sheets of paper in a variety of patterns for $12.  You could just buy individual sheets to fit your specific needs, but I like to change things up occasionally - and I've used the paper for other projects as well.

Next, I found these record album covers on sale at Michaels for $5 each (you can now buy a 3-pack for $10).

So for around $31, I created this in my office:


I swap the scrapbook pages out depending on my mood/the season.  These actually started out in my living room over the couch, but were re-purposed into office décor when I moved into my house.

So not only is this project budget-friendly, it also appeals to those who have a hard time making up their minds. *points finger directly at self*

The Internet is Your Friend

Last Christmas, my best friend got me this really cool print from Etsy that says "My Dog Thinks I'm Cool."  I have no doubt that both of my mutts see me for the dork that I am - but I used the gift as inspiration for a gallery wall in my foyer.


You'll note that the dog print isn't actually on the wall anymore.  I recently listed my home for sale, and didn't want my entryway screaming MULTIPLE DOGS LIVE HERE to any potential buyers.  So I needed to swap out the puppy pictures for something a little more neutral.  This is where the internet becomes your best friend - there are tons of free images available for you to use.

*Note - this does not mean go onto the internet and steal other people's art.  Make sure that anything you are printing is free for your use.

I found this free wall art collage from Smitten on Paper that fit my needs perfectly.  I downloaded the images and messed with the sizing in PowerPoint. I printed the images on cardstock that I purchased for a little more durability.

The picture ledge ($15) and square mirror ($1) are from IKEA.  The red frames ($3) were actually clearance finds from Kohls and the white frames ($4) are Room Essentials from Target.  The largest print and frame were a gift, and the red tea light holders are another re-purposed element. Total project price: $36.50.

Now my entryway is a little more neutral, and I can swap out the images any time that I feel like changing my mind (if you're sensing a pattern here, you're not wrong).

Use Stuff You Already Have

Whenever I get stuck on a decorating project, I usually start looking through my stash.  Everybody has one of these, right?  A box or bin full of stuff that you used to use but put away for a while or those items that you found on clearance but didn't really have any use for at the time.  Surely it can't just be me.

A lot of times it's just me, sitting in a room sifting through old magazines that I just plain can't throw away.  I interned and also worked for a magazine for a few years, and let me tell you something - blood, sweat and tears go into that copy of Martha Stewart Living that you just tossed in the trash.  So my hoarding senses kick in when it comes time to throw away something that I will never read again.  Meaning I have stacks upon stacks of old reading material buried in closets and under all of my beds.

Normally - I would just admit that I have a problem and be done with it.  But squirreling those magazines away actually came in really handy when it came time to decorate my office.

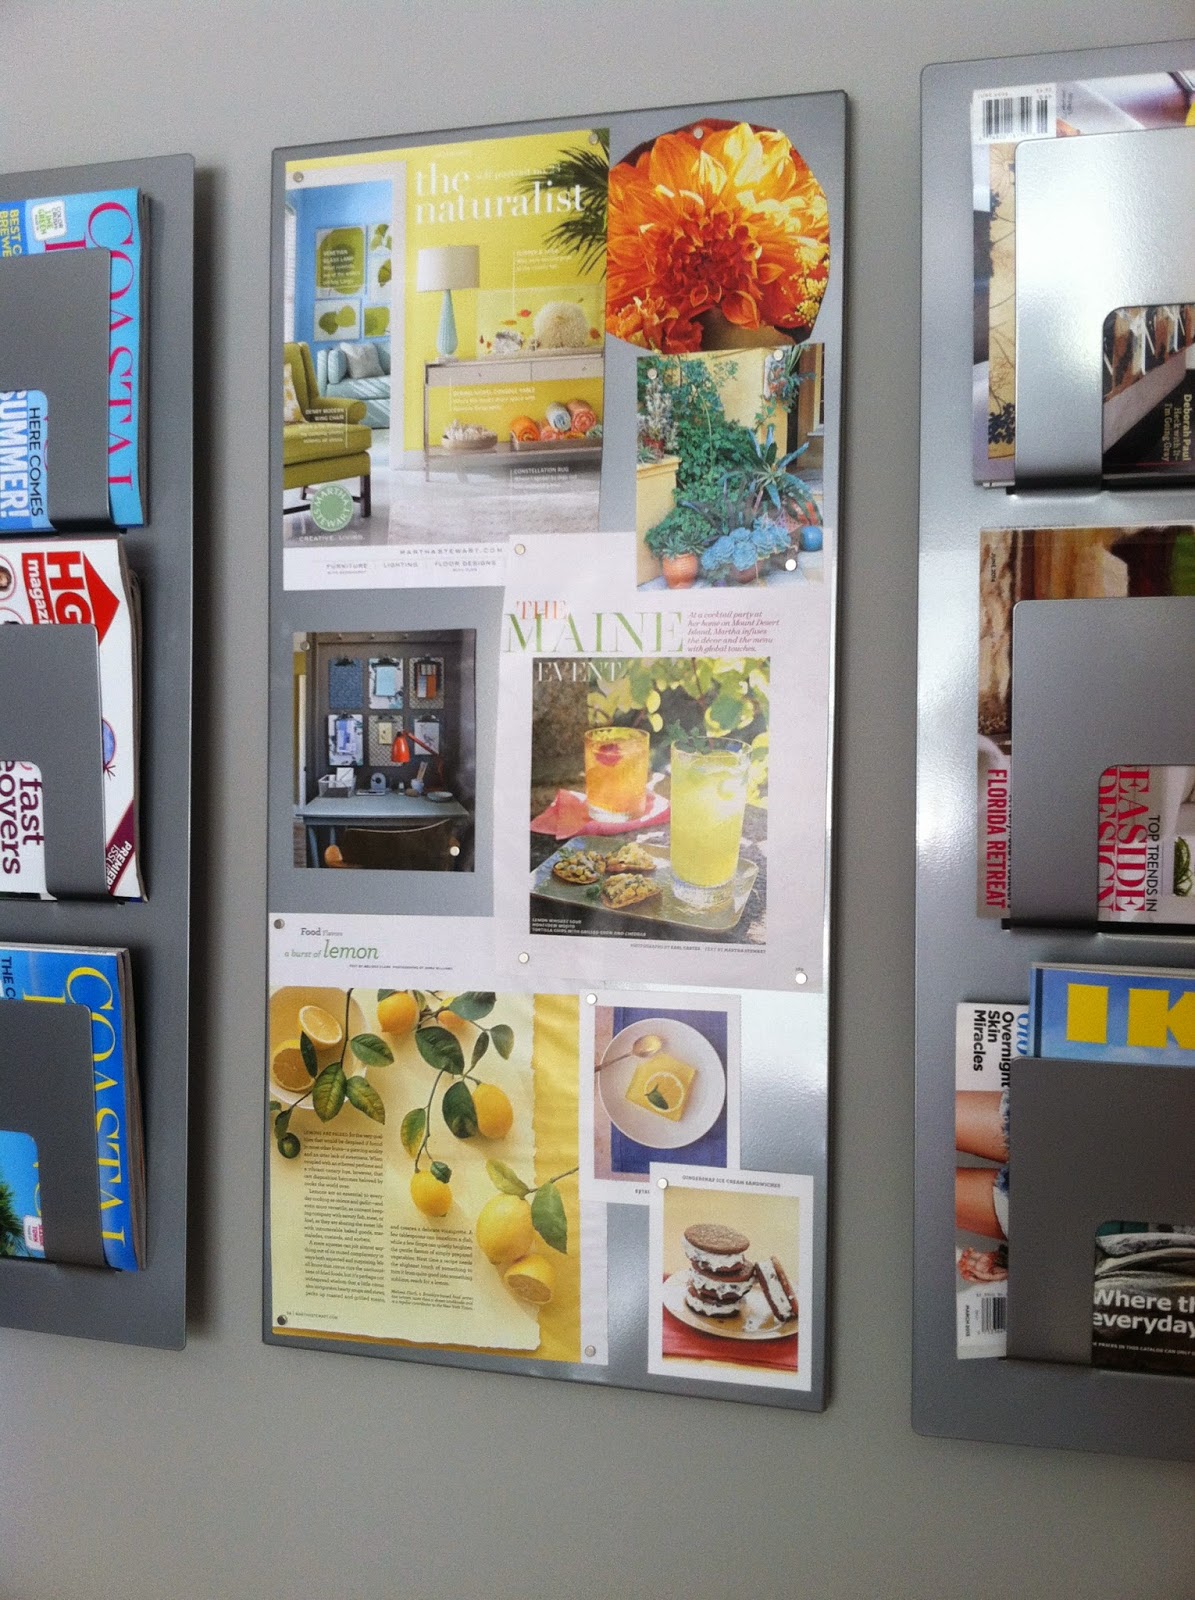
During my second trip to IKEA (and all of its wonder), I came across this example of organizational genius:


I bought two of the magazine racks for $10/each and one of the magnet boards for $13.  The magnets were $13 from The Container Store (you could obviously get these for much cheaper - but I wanted some that were going to be pretty much invisible on my board).  All of the magazines and clippings were free, and I swap them out as inspiration hits me.


Total project cost: $46.


Just because you can't afford to spend tons of cash decorating your home doesn't mean that it can't be stylish and functional.  I've found some of my favorite pieces scouring clearance racks.  It doesn't need to be expensive to have a place in your house.  You just need to love it enough to make it part of your home.

Jordan


Read More »